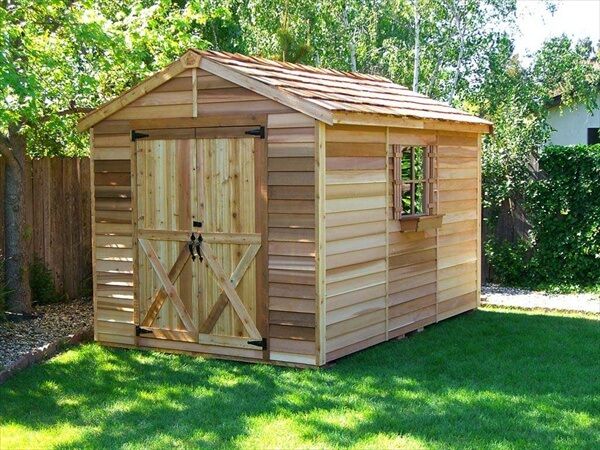
Build Your Own Rustic Pallet Shed: A Simple & Affordable Guide
Tired of overflowing garages and cluttered yards? Dreaming of a charming, rustic storage solution without breaking the bank? Then look no further! This guide provides a step-by-step plan to build your own pallet shed, a project that's both satisfying and surprisingly easy on the wallet. Prepare to transform unused space into a functional and aesthetically pleasing addition to your property.
Gathering Your Materials: The Foundation of Your Pallet Shed
Before you even touch a hammer, carefully gather your materials. This crucial step ensures a smooth building process and minimizes frustrating trips to the hardware store. The beauty of this project lies in its affordabilityâ€"repurposed materials are key! We'll primarily use reclaimed pallets, but be sure to check for any treatments before using them. Some pallets are treated with chemicals that are unsafe for outdoor use or food storage. You’ll also need some basic tools and a few new items.
Essential Materials List:
- Reclaimed Pallets: Aim for 10-15 sturdy pallets, depending on your desired shed size. Inspect them for rot and damage before using.
- Concrete Blocks or Pressure-Treated Lumber: For the foundation â€" provides stability and protects the wood from ground moisture.
- Roofing Material: Choose a cost-effective and weather-resistant option like corrugated metal sheets or asphalt shingles.
- Screws: Exterior-grade screws are vital for durability. Consider galvanized screws to resist rust.
- Wood Glue: Reinforces the pallet joints and enhances stability.
- Hammer, Screwdriver, Drill, Level, Measuring Tape, Saw: Basic tools for construction.
- Optional: Exterior wood stain or sealant to protect the wood and enhance the rustic look.
Constructing the Pallet Shed Frame: Building the Bones
With your materials assembled, it's time to build the frame. Start by creating a level foundation using your concrete blocks or pressure-treated lumber. This ensures a stable base for your structure. Next, carefully disassemble the pallets, separating usable boards. Inspect each board for soundness and discard any damaged pieces. Using your measurements, construct the walls by screwing together the reclaimed pallet boards, creating a strong and rustic framework. Remember to maintain a consistent gap for ventilation and to check for squareness frequently using your level. Building the frame is like creating a sturdy puzzle, paying attention to detail will yield a satisfying result.
Roofing and Finishing Touches: Adding the Finishing Flourishes
Once the frame stands strong, focus on roofing. This involves measuring and cutting your chosen roofing material to fit your shed's dimensions. Secure the roofing material using appropriate fasteners, ensuring proper overlap for weather protection. Remember, a well-secured roof is crucial for the longevity of your pallet shed. After the roofing, add any finishing touches. This might involve adding a simple door, constructed from remaining pallet wood or other materials. You could also enhance the rustic charm with a coat of weather-resistant stain or sealant. Adding a latch or simple lock will secure your belongings.
Enjoy Your New Rustic Pallet Shed!
Congratulations! You've successfully built your own rustic pallet shed. This cost-effective and environmentally friendly project not only provides valuable storage space but also adds a unique and charming element to your property. Remember that personalization is key; feel free to customize your shed with additional features, like shelves or hanging hooks, to best suit your needs. Enjoy your new outdoor storage space!
No comments:
Post a Comment